Indoor Painting Tips

Indoor painting is a job that many homeowners can do themselves, especially if they have at least some painting experience. Regardless of experience level, it is a good idea for homeowners to consult one of the painting experts at United Home Experts before embarking on a painting project.
Here in the Northeast, United Home Experts is the recognized leader in interior home painting; they can get the job done professionally, or they can provide the homeowner with invaluable indoor painting tips and tools the homeowner needs to do the job him- or herself.
Homeowners are faced with a choice between oil-based paints and latex paints, which are water-based. In the old days, everyone used oil-based paints for everything, and oil-based paints are certainly an excellent choice. However, clean-up requires paint thinner or some other solvent and can be time-consuming and messy.
Today’s painter generally opts for water-based latex paints. As long as walls are thoroughly cleaned before application, latex paints work wonderfully and even have a few other advantages over oil-based options, especially if children are in the house. For one thing, latex paint cleans up with soap and water. This is much easier and safer than using a solvent cleaner. Plus, latex paints (when dry) are much more easily cleaned with a damp cloth, or with just a touch of mild soap. This can come in especially handy when sticky little hands have made a mess around light switches and door knobs!
One of the first things a homeowner must do is decide approximately how much paint is needed for a job. Multiply the height of a wall by the length of a wall to get the square feet. Add all the walls together to determine the total number of square feet that need paint. Then look on a can of paint to see how many square feet a gallon of paint can cover. Divide the total number of square feet by the number of square feet covered by each gallon to determine the total number of gallons needed.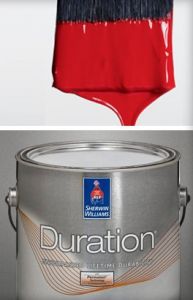
If it will take more than a gallon or two to finish painting, get a large bucket – say a five-gallon bucket – and pour several gallons at a time into the larger bucket and mix thoroughly. This will help maintain the exact same color throughout the project. As paint is used, additional gallons are poured into the five gallon bucket and mixed in. It is an unfortunate truth that blue is not always blue and green is not the exact same shade of green from one can of paint to the next. They may be close, but not exact. That might not seem to make a huge difference until the homeowner ends up with a wall with one half painted using one can of robin’s egg sky blue and the other half painted using a can of the same color…only the two colors are just slightly off from each other. Save the headache – mix cans from the beginning.
Wash the walls with a mixture of water and TSP or a mild detergent. All grease, grime and dirt must be removed in order for the new paint to form a lasting bond with the wall. Rinse TSP or detergent from the wall with a cloth dipped in clean water (changing the water as often as necessary to keep it clean) and then allow the wall to dry thoroughly before beginning the paint job.
Cut in (that is, paint out four inches from a corner) on one wall at a time and as soon as one wall is cut roll the wall using long strokes, rolling from one side of the wall to the next. The idea is to avoid lap marks, which are caused when cut-in paint is allowed to fully dry before the rest of the wall is rolled. Prevent lap marks by always rolling onto a wet edge.
To prevent one color of paint from going to an area where it is not wanted, tape the area using blue painter’s tape. The real secret to using painter’s tape correctly is to let the paint dry fully before removing the tape. That should produce a straight and clean painted edge and the blue tape will not leave any adhesive behind, as can happen with other tapes.
Patches in walls need special attention. Most walls are textured and it is important to texture the patch before painting so that the texture of the patch matches the texture of the surrounding wall. Cans of spray-on texture can be purchased at paint, hardware stores and home centers. Use sparingly; add more texture as needed until the patch matches the rest of the wall. Then, because patches absorb paint far more than the rest of the wall will, the patch needs to be primed once the spray-on texture is dry. Allow the primer to dry fully before painting the wall with the final color.
To keep the texture even, it is advisable to roll paint as close to the edge of a wall as possible. Often this means taping the adjoining wall at a right-angle corner to prevent the edge of the roller from putting paint on the other wall as the roller is brought as close to the cut-in corner as possible. The reason for this is because a roller adds texture to paint and because the cut-in corner has been painted with a brush, there is no roller-texture next to the wall. Rolling up close solves this problem.
Cotton makes a better drop cloth than plastic. While it is true that thin plastic drop cloths are cheaper than cotton, they also do not work nearly as well. Plastic sticks to shoes and gets twisted and tangles easily, often depositing paint onto carpets or furniture. Plastic drop cloths are not reusable and cotton ones are. No need to wash cotton drop cloths; just allow them to dry and use over and over, from one day to the next, one painting project to the next.
If it is not possible to paint into a wet edge for one reason or another, feather the paint out into the wall by several inches to hide the fact that there is a line where the wet paint was placed over dry paint. By feathering the paint out, using lighter pressure on the roller as the roller moves away from the wall until the roller is lifted off the wall, the line can be hidden to the point that it will go unnoticed.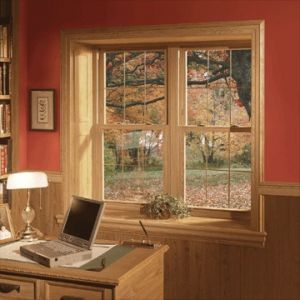
When painting trim or other wooden surfaces, lightly sand the surface with a fine-grit paper or rub with steel wool between coats of paint. This will make for a smoother, more professional-looking finish. Wait until the first coat of paint has thoroughly dried before sanding, then paint with long, smooth strokes, putting an even final coat of paint on the wood.
As with most things, painting technique improves the more one practices it, but even a poor technique can be vastly improved by following the tips in this article. Before tackling any interior painting job, the homeowner should contact the experts at United Home Experts for professional help and advice.


This is some really good information about commercial painters. I liked what you said about washing the walls beforehand. It does seem like a good thing to be aware of when you want to paint your home. I need to update my home getting new paints on it would be nice.
Good luck with your exterior work, Ivy! Let us know if you have any questions before you begin.